Why Fit Decides Whether a No-Pull Harness Works
Buyers usually treat pull control as a component question: which ring, which webbing, which buckle. In production, most failed no-pull claims come from a different source. The mechanism is sound, but the harness does not sit where the mechanism assumes it will sit.
Pull control is a geometry problem, not a label
A front attachment works by changing the direction of the leash load. When the dog moves forward, the leash pulls sideways and slightly backward from a point on the chest, so forward effort becomes less efficient and the dog's body angles away from the handler. That effect depends on three positions being stable: where the ring sits vertically on the chest, how far forward it sits, and how much the harness can rotate under load without sliding around the ribcage.
Move the ring down and the harness tends to ride up into the throat. Move it up and the leash starts to act like a neck attachment, which defeats the purpose and concentrates pressure. Move it too far toward the shoulder and the leash load pulls the whole harness diagonally, so the padding migrates and the dog's gait shortens on one side. None of these failures look like a hardware defect in a photo. They show up as fit complaints, exchanges and one-star reviews six weeks after launch.
The same design behaves differently in two sizes
A harness pattern scaled up or down by a fixed percentage does not preserve the fit window. Chest depth grows faster than chest circumference in many breeds, strap take-up is partly consumed by padding thickness, and the same 25 mm adjuster offers proportionally less travel on a small size. A design that controls a 30 kg dog correctly can sit several centimetres too low on a 12 kg dog in the same range.
This is why a no-pull dog harness manufacturer should be judged on the size set, not the hero sample. Ask for one unit in every size, measured, and compare where the attachment point lands relative to the sternum. If the position drifts across the curve, the range will produce inconsistent behavior claims no matter how good the hardware is.
The Fit Window: Four Measurements to Lock Before Sampling
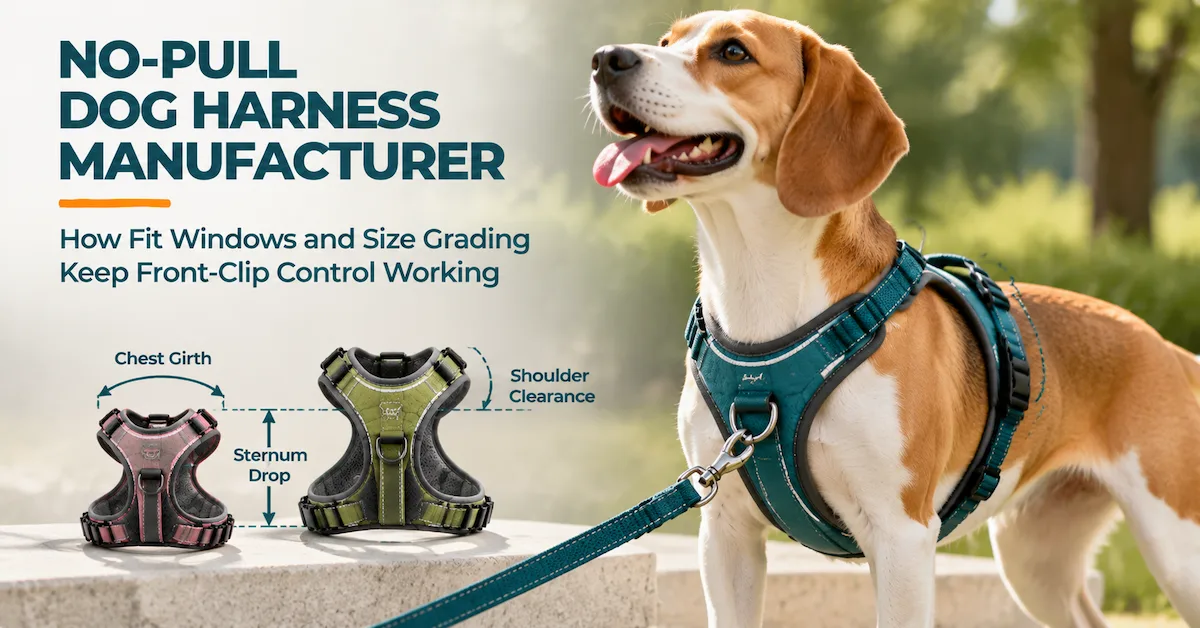
Before a sample is cut, the brand should define what "correct fit" means numerically. Four measurements cover most of the risk. Each one should be recorded with the measurement method, the body landmark used, and the tolerance the factory is allowed.
| Measurement | How to capture it | What it controls | What to state in the brief |
|---|---|---|---|
| Chest girth at the widest point | Cloth tape behind the front legs, around the deepest part of the ribcage, dog standing | Whether the harness closes at all, and how much padding compresses under load | Range per size, plus the girth the size is designed to sit at (not the extremes) |
| Neck opening / slip-over clearance | Tape around the base of the neck where the harness collar band will rest | Whether the harness can be put on without forcing, and whether it can slip off a narrow-headed dog | Neck range per size and the head-to-neck ratio the size assumes |
| Sternum drop (front attachment height) | Vertical distance from the top of the withers or the collar band down to the sternum, dog standing square | Where the front ring sits vertically, and therefore how the leash load is directed | Target height window as a percentage of sternum drop, usually a band rather than one number |
| Shoulder and leg clearance | Distance from the front leg crease to the nearest strap, and strap path over the shoulder | Gait, chafing under the armpit, and how far the harness rotates when the dog pulls | Minimum clearance per size and the strap path to avoid (over the point of shoulder) |
Chest girth: design to the middle, not the edge
Many size charts are written as a span from the smallest to the largest girth the harness will close around. That is a manufacturing limit, not a fit specification. A harness that only closes at the top of its range has almost no adjustment left, so the padding cannot settle and the front ring rides high. Define a design girth in the middle of the range and treat the ends as tolerance, then check that at least a third of the adjuster travel remains available at the design girth.
Neck opening: the escape and comfort check
For step-in and slip-over harnesses, the neck opening decides two things that buyers rarely separate: comfort during donning and resistance to backing out. A whippet and a bulldog with the same chest girth need very different neck openings. If the range covers both shapes with one pattern, the result is usually a harness that is loose on the narrow-chested dog and difficult to put on the broad-chested one.
Sternum drop: the number that makes front-clip control repeatable
This is the measurement most often missing from a tech pack, and the one that determines whether a front clip dog harness behaves as intended. Rather than specifying an absolute height in millimetres, specify the target position as a proportion of the dog's sternum drop and give the factory a band: at the design girth, the centre of the front ring should sit within a defined vertical band below the collar band. That way the pattern can be graded anatomically while the control geometry stays constant.
Shoulder clearance: where comfort complaints originate
Look for a minimum clearance between the front leg crease and the closest strap, and specify the strap path so it passes beside the shoulder rather than across the point of shoulder. Under tension, a strap that crosses the shoulder joint pulls the harness forward on that side and shortens the stride. This is the single most common reason a technically correct no-pull design still generates "my dog walks oddly in it" feedback.
Size Grading: Building a Curve That Keeps Control
Grading is where a good sample becomes an inconsistent product line. Two decisions drive most of the outcome: how many sizes the range needs, and how much adjacent sizes overlap.
How many sizes a program really needs
More sizes reduce fit risk but multiply tooling, pattern work, packaging and inventory. A practical rule is to tie the number of sizes to the spread of chest girths the brand actually intends to serve, not to a competitor's chart. If the target market is small and medium companion dogs, four sizes usually cover the range with usable adjustment. If the program includes large and giant breeds, the curve needs wider intervals at the top and a different reinforcement level, because the load on the front ring and stitching rises faster than the strap length does.
Overlap between adjacent sizes
Adjacent sizes should overlap by enough that a dog near a boundary fits both, but not so much that the overlap creates two products competing for the same dog. Overlap also protects the brand at the edges of each size, where the front ring position drifts furthest from its target.
| Example size | Chest girth range (general guidance) | Design girth | Typical dog reference |
|---|---|---|---|
| XS | 28–36 cm | 32 cm | Small companion breeds |
| S | 34–44 cm | 39 cm | Small to medium |
| M | 42–54 cm | 48 cm | Medium, most urban walkers |
| L | 52–68 cm | 60 cm | Large, strong pullers |
| XL | 66–84 cm | 75 cm | Very large and giant breeds |
These numbers are an illustration of curve structure, not a universal chart. The correct intervals depend on the breeds the brand sells into. What matters is that each size has a stated design girth, a defined vertical band for the front attachment, and a reinforcement level appropriate to the loads that size will see.
Where grading usually breaks
Three patterns account for most failures. First, a constant padding thickness across all sizes, which makes the smallest size fit far tighter than measured because the same foam eats proportionally more girth. Second, a fixed strap width and adjuster type, which leaves the small sizes with little usable travel and the large sizes with hardware that is undersized for the load. Third, an attachment point placed by eye on the sample size and then scaled by percentage, which shifts the ring position across the curve and changes how the harness behaves.
Matching the Attachment Layout to the Size Range
Once the fit window is defined, the attachment layout can be chosen against it. Each layout has a different tolerance for fit error, and that tolerance should influence how ambitious the size range can be.
| Layout | Control effect | Fit sensitivity | Best suited to | Common failure mode |
|---|---|---|---|---|
| Front-clip only | Strong steering; forward effort becomes inefficient | High — needs a stable sternum position | Training programs, strong pullers, dogs that lunge | Harness rotates or rides up when the ring sits too low |
| Dual attachment (front and back) | Front for control, back for relaxed walking; one product, two uses | Medium — more forgiving because the back ring carries load | Retail lines sold to mixed-skill owners | Confusing labeling; owners default to the back ring and report "no control" |
| Martingale-style front loop | Loop tightens modestly under load to resist backing out | Medium to high — loop travel must be limited | Sighthounds, narrow heads, escape-prone dogs | Over-tight loop; pressure on the throat if travel is not capped |
| Back-clip only | Comfortable but little steering effect | Low | Calm dogs, casual walking lines | Marketed as no-pull and returned when it does not reduce pulling |
For a range that spans small companion dogs to large, strong pullers, one layout rarely serves all sizes well. A common approach is a dual-attachment design across the range, with the front ring position and reinforcement specified separately for the large sizes, and the martingale variant reserved for the shapes that need it. This is where a no-pull dog harness manufacturer earns its value: not by offering a mechanism, but by specifying how that mechanism changes across the curve.
If the line also needs to serve owners who walk at night or in traffic, reflective placement belongs in the same conversation as the attachment layout, since both compete for space on the same chest panel. Our article on custom dog harness development covers how these combined requirements are carried through a design brief.
What Belongs in the Tech Pack
A no-pull harness tech pack should let a factory reproduce the fit window without guessing. The table below lists the elements that most often go missing and the check that closes each gap.
| Element | What to specify | How to verify it | Why it matters |
|---|---|---|---|
| Front attachment position | Height band relative to sternum drop, horizontal offset from centreline, ring orientation | Measure the golden sample in every size; mark the target band on the pattern | Controls the direction of leash load and the steering effect |
| Ring specification | Material, wire diameter, internal opening, finish, weld or solid form | Pull test on the assembled harness, not the loose ring | The ring is only as strong as its attachment to the webbing |
| Webbing width by size | Width and thickness per size, not one width across the range | Measure finished straps after sewing, including take-up | Undersized webbing on large sizes concentrates load and distorts the fit |
| Padding and lining | Foam thickness, mesh type, edge finish, coverage area at the chest | Check compression at the design girth and inspect edges after washing | Padding changes the effective girth and is a main chafe source |
| Buckles and adjusters | Type, size, rated load, colour, branding area | Cycle open and close; test adjustment under tension | Adjusters that slip under load destroy the fit window in use |
| Stitching | Stitch type, density, thread spec, bar-tack positions at load points | Visual inspection plus destructive pull test on production units | Most field failures start at the stitching around the ring |
| Labeling and size marking | Size on the product, fit instructions, attachment guidance | Read the finished article as a customer would | Wrong size selection is indistinguishable from a design fault in reviews |
Hardware load and stitching
Load does not distribute evenly through a harness. It concentrates at the front ring, the adjusters nearest the chest, and the junction where the chest panel meets the shoulder strap. Those three points should be specified individually, with bar-tacks or box-X stitching and, for the large sizes, a reinforcement layer behind the ring. A single "reinforced stitching" note in the brief is not a specification.
Webbing width and padding by size
Strap width is a comfort and load decision, not a styling one. Wider webbing spreads pressure but adds stiffness and weight, which matters most on the smallest sizes. A common pattern is narrower webbing with proportionally thicker padding on small sizes, and wider webbing with a thinner pad on large sizes. Whatever the choice, the width should be stated per size so the factory cannot simplify the range to one strap.
Common Mistakes Buyers Make When Sourcing No-Pull Harnesses
- Approving a sample in one size. A single medium sample tells you almost nothing about whether the front ring lands correctly on an XS or an XL dog.
- Writing the size chart from the harness, not the dog. Ranges built from adjuster limits produce products that only fit at their extremes.
- Copying a competitor's pattern without its anatomy. The visible geometry of a popular no pull dog harness front clip design depends on a specific sternum position that may not exist in your target breeds.
- Treating "no-pull" as a label rather than a specification. If the tech pack does not define the attachment position, the factory will place it where the pattern is easiest to sew.
- Ignoring the handle. A no pull dog harness with handle is often specified late, and the handle then displaces the back attachment or stiffens the panel over the shoulders.
- Skipping the adjustment sweep. Testing only at the design girth hides the behaviour at the top and bottom of each size, where most fit complaints originate.
- Forgetting documentation for the claim. Retail partners increasingly ask for the evidence behind a control claim; a design file and test record answer that question faster than a marketing sheet.
How to Validate Fit and Control Before Bulk Production
Validation does not require a laboratory, but it does require dogs that are not the sample fit model. A practical sequence:
- Measure the whole size set. Record every key dimension on one unit per size and compare against the fit window. Reject the set if the front attachment drifts outside its band in any size.
- Fit on at least three body shapes per size. Include a narrow-chested dog, a broad-chested dog, and a dog at the top of the size range. Photograph the harness standing and under light tension.
- Run a pull trial. Walk each dog on the front attachment with a handler who is not the fitter. Watch for rotation, riding up, and any change in stride.
- Sweep the adjustment. Test each size at the design girth, at the low end and at the high end. Note where the harness starts to slip or the ring position changes materially.
- Wash and re-measure. Padding compresses and webbing relaxes. Re-check the fit window after the care cycle the label will recommend.
- Cycle the hardware. Open and close every buckle and adjuster repeatedly, and load the front ring, looking for deformation at the stitching rather than only at the metal.
Keep the approved unit from each size as a golden sample, measured and signed, and hold it at the factory as well as at the brand. That is what makes a reorder repeatable, a point covered in more detail in our guide to preparing a dog harness RFQ.
Documentation and Quality Signals Worth Asking For
Quality management certification does not certify a harness design, but it does indicate whether the factory can hold a specification between orders. ISO 9001:2015 sets out requirements for a quality management system, including documented processes and corrective action, which is the structure that keeps a size set consistent from run to run (ISO 9001:2015).
Alongside that, ask for the social compliance audit report (BSCI is common in the sector), test reports from a recognised laboratory such as SGS covering the materials actually used, and OEKO-TEX documentation if the lining or webbing is claimed as tested for harmful substances. Then ask the operational questions that certificates do not answer: who measures the golden sample, how a measurement out of tolerance is handled, and whether size grading changes require a new sample approval.
For a broader comparison framework, our dog harness supplier scorecard sets these signals against commercial terms.
Harness Platforms We Build Custom Programs From
QQPETS has manufactured pet accessories since 2008, with a 5,000 m² factory, a team of more than 200 people, and in-house weaving, cutting, sewing, printing and packaging workshops. We hold ISO 9001, BSCI, SGS and OEKO certification, and we run OEM and ODM programs for brands and distributors, including private-label branding, custom logo and pattern design, material selection and bespoke packaging, with an MOQ of 30–40 pieces for custom harness work.
Two harness platforms are the usual starting points for a no-pull program:
- Adjustable Dog Harness — built on adjustable straps with easy-to-use buckles and a breathable mesh lining, with the adjustment range intended to keep the harness in place and reduce chafing. Available with custom colour and pattern work.
- Holo Paws Reflective Dog Harness — a reflective geometric pattern covering the full back panel, soft breathable mesh padding, and an ergonomic layout that spreads pressure across the chest and shoulders, with adjustable straps, quick-release buckles and a reinforced heavy-duty D-ring at the back.
Both are platforms rather than fixed SKUs: attachment layout, strap geometry, padding and size grading are defined per program. If you are weighing which platform suits your range, the factory-level design considerations in our article on how no-pull control is engineered explain the structural side, while this guide covers the fit side.
FAQ
What does a no-pull dog harness manufacturer need from me before sampling?
A target breed list or body-shape profile, the chest girth range you intend to serve, the attachment layout you want, the reinforcement level for your largest size, and the fit instructions you plan to print. Without the girth range and body shapes, the factory can only copy an existing pattern.
How do I measure for a no-pull dog harness across a size run?
Measure chest girth at the widest point behind the front legs, neck circumference where the collar band will rest, and sternum drop with the dog standing square. Collect these from real dogs in each size band rather than from a single model, then set a design girth for each size.
Is a front clip dog harness suitable for every size in a range?
The layout can be used across a range, but the front ring position and reinforcement must be specified per size. Small sizes need proportionally different padding and adjuster travel; large sizes need stronger webbing, a heavier ring and additional stitching at load points.
What is the difference between a no pull dog harness and an anti pull dog harness?
In the market the terms are used interchangeably. Technically, an anti pull dog harness is any design that reduces forward pull through geometry or a tightening loop, while "no pull" is the marketing claim attached to it. Neither term describes a test method, so the brand has to define what the claim means in its own specification.
Do no-pull harnesses work for large dogs and strong pullers?
They work when the harness fits and the load path is stable. A no pull dog harness for large dogs needs a wider chest panel, heavier webbing, a stronger attachment ring and stitching rated for the load, plus a size curve with wider intervals at the top end. A design that controls a medium dog will distort on a dog twice its weight.
Can I add a handle without affecting the pull control?
Yes, if the handle is planned early. A no pull dog harness with handle needs the handle anchored so it does not pull the back panel forward or displace the front attachment under tension. Adding it after the pattern is approved usually requires a new sample.
How many sizes should a no-pull line have?
Four to five sizes cover most companion and medium breed ranges with usable adjustment. Programs that include large and giant breeds often need a sixth size or wider top-end intervals, plus a separate reinforcement specification for the largest sizes.
How do I check that a factory can repeat the fit on reorders?
Ask for a measured golden sample per size, held at the factory, with the measurement record and the tolerance limits. Then verify the first reorder against it before the shipment leaves. If the factory cannot produce a measurement record, the fit window is not under control.
Conclusion
No-pull performance is decided before the first stitch: by the four measurements a brand defines, the way those measurements are graded across the size curve, and the attachment layout chosen to match that curve. A no-pull dog harness manufacturer that can hold those numbers between orders gives a brand a product that behaves predictably on a Chihuahua and on a Rottweiler, not just on the sample dog.
If you are planning a no-pull harness range, you can review our harness and walking ranges or send your target size range and body-shape profile through our contact page; our team can review the fit window with you before sampling.